Junosphere Quickstart guide
Create a Topology
AutoNetKit will process a network topology which is presented in GraphML format. Diagrams can be created using a tool such as yED, which is available from http://www.yworks.com/en/products_yed_download.html.
A wide range of network topologies are available from http://www.topology-zoo.org/dataset.html
- Using yED, you can build a topology by dragging in two or more ‘shape nodes’.
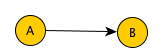
- Left-click on a node, hold and drag a connector to the other node to get a connection. Direction is unimportant — AutoNetKit will automatically make all drawn directed links bi-directional.
- Alternatively, download a topology from http://www.topology-zoo.org/dataset.html. Open the file in yED and use options from the ‘Layout’ menu to see the node connectivity.
- You can set the Router’s name using the Data/Label field which is present in the node’s properties view, by double-clicking on a node, or by selecting a node and pressing the Enter key.
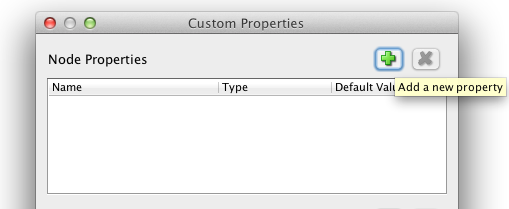
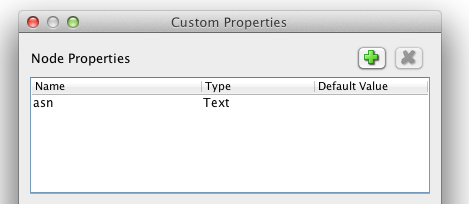
- Add the asn numbers by adding ‘Edit/Manage Custom Properties’, create a node property called ‘asn’. and press close
Now will see ‘asn’ present under Data field.

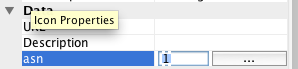
If the asn numbers are different between connected nodes, you will get an eBGP peering. If the asn number is the same, the result will be iBGP peering.
- Save your file in GraphML format when you’re done.
Generating Junosphere Configuration Files
Please note: the Junosphere command has changed from –junos to –junosphere
To generate Junosphere configuration,
Windows:
open a cmd session (run cmd.exe) cd into the scripts directory where autonetkit has been installed (C:\Python27\scripts), then:
autonetkit -f <path to .graphml file> --junosphere [--ospf|--isis] [ --plot]
Mac:
cd into the directory where you have the graphml file and then:
autonetkit -f ./test.graphml --junosphere [--ospf|--isis] [--plot]
The --ospf option will create an IGP configuration for OSPF where as --isis will create an IGP configuration for ISIS. BGP configuration will be created automatically if the asn properties field is present for a node (as described above).
The “–plot” option will generate network graphs in an html format and place them in the directory “ank_labplots”.
The script will place all of the files it creates in a directory called ank_lab. It generate a .gz file which can be uploaded into the Junosphere ‘Library’ where it will be unpacked ready for use. A subdirectory will be created called junos_lab. This will contain the resulting Topology.vmm and configset directory, in which you will find the per-router configuration files. Previous configuration files are stored in the ank_lab/archive directory.
Olive-Based Junosphere
If you have a custom Olive-based Junosphere install, you will need to tell AutoNetkit to create the relevant configuration files. You will need to create a configuration file autonetkit.cfg in the same directory that you run the autonetkit -f... command in. This file follows the same format as a .ini file. For Olive-based Junosphere, you will need the following entries:
[Junosphere]
platform = Olive
basedisk =  /path/to/image/junos.img
(the basedisk parameter is optional).
You should then see the following confirmation in the console output:
INFO Configuring Junos: junosphere_olive
Standard Junosphere has the following console output:
INFO Configuring Junos: junosphere
You can switch back to standard Junosphere by removing the platform line (as VJX is the default), or by explicitly setting:
[Junosphere]
platform = VJX
Generating AutoNetkit Configuration Files
Please refer to the Netkit Tutorial.